Concrete Nested End Tables
Introducing a new material to the mix - concrete
Introduction
I tried something very new with these concrete nested end tables. It ended up in the right place, but it was a bit of a bear to get it there. Working with concrete is very different than working with wood. That might sound obvious but it needs to be said. And my artistic skill with the materials were novice at best. Details below.
I thought solid wood was heavy until I made this. Moving these requires a warm-up and a good stretch beforehand.
The concrete I used was a special artisan blend from [Buddy Rhodes]{:target=”_blank”}.
Under Construction

In Fine Form
The first thing you need to do for a concrete top is make a form mold for the pieces.
A neat trick I found on YouTube was to use a bead of black silicone around the seem to seal the edges, and also give you an nice quarter-round soft edge on the table top when you flip it over.
The black colouring makes it easier to remove when you are done. Made from spare melamine I had from some old shelving.

The Legs
Standard leg with an apron. Only tricky part here is that I made the apron extra beefy, and put brackets in there for added strength. The extra strength is needed at the top, as these are nested tables, you cannot put any stretchers further down on the legs for extra support.

The Poor Pour
OMG did these turn out awful. When I initially poured the tops, I had such high hopes. My buddy Mike helped me blend the concrete in a bucket and make the pour. That was tough but it went well enough.
In my dream, I had though this was going to be an eggshell white with a few flecks of gray. Boy was I wrong. I looked like some kind of bad Rorschach Inkblot test. Not a happy camper at this point. I had no idea how to fix this.

The Fix Is In
Six weeks pass. During that time I tried various things. Many, many various things, including just walking away in disgust for a week.
Eventually I applied a thin layer of a beigy concrete topcoat, and sanded and smooth it down until I got the finish I wanted.
If you have ever sanded concrete, well it makes sanding wood seem like a dream. If you sand concrete when it’s dry, you get a toxic cloud of ultra fine dust everywhere. If you do it wet, you have mud splattered in every direction. No fun either way.
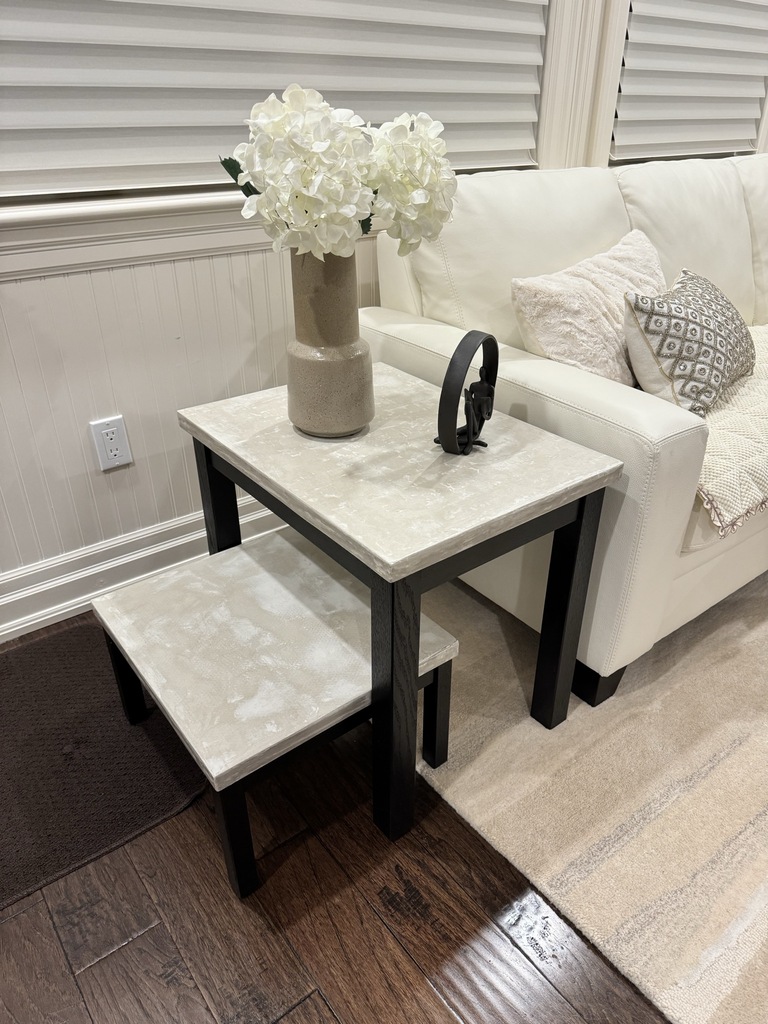
But it worked out well in the end. I can honestly say I am very happy with how it turned out, a nice eggshell and beige patina.

Call Me Hairy
This one took a long time, so it gets another pic. I like the hairy arm in the photo. Is that mine?
In Production
This gets used on a daily basis as a cleaning station for the boys when they come in from the outside.

Materials
- Red Oak from KJP Select Hardwoods
- Festool Domino for joinery
- Rubio Monocoat finish
- Buddy Rhodes concrete products