Gazebo Bedframe
A slimmed down, low riding bedframe, made from white oak for our Gazebo out back
Background
We have a small building out in the back, about 12′x16′. It was originally intended to be a furniture storage shed for keeping our outdoor stuff protected from Ottawa winters. Well, the builders were doing such a nice job, and the place turned out way better than expected, so we turned it into a little “Gazebo”, a little place to escape to when the world is a bit too crazy, or you just want some quiet on a nice spring day.
So we did it up a little nicer than your typical storage shed, putting in some nice flooring and drywall etc. A TV an a bed were also added, but the bed was a bit too big, so I made this custom bedframe. Its a low riding frame to keep the size down, made of white oak sides, with fir for the lats and plywood for the pedestal.
It was a pretty simple standard project, and we can’t have that, so I added some LED lighting to the outside rim of the frame to give it some pizzaz. Details below.
The Bedframe
The Design
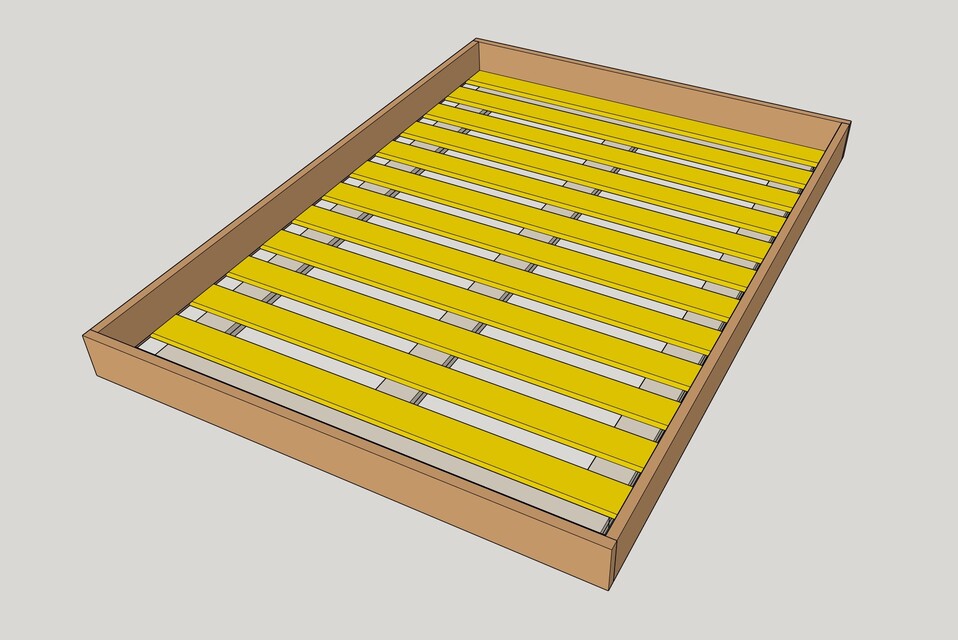
Per my usual process, I drew this up in Sketchup, shown in the pic above, which helps you visualize everything up front, the theory being it will minimized mistakes later. This is often true, but not always.

The Pedestal
The pedestal for the bed is a bunch of plywood strips each about cut about 10cm (4in) wide. It was doubled up to make it about 36mm (1.5in) high, and given we wanted to keep this frame low to the ground, that worked out great.

Pedestal Glue-up
This pic might make it look like I am gluing the plywood together here, but I am actually gluing on white-oak edge banding to hide the visible plywood layers on the side of the pedestal. Now its a pretty low slung bed, so one isn’t likely to see the pedestal from the sides, but still, I want it to look nice when someone does see the underside.
I made the edge banding myself, from offcuts of the sides of the bedframe itself. Cut them rough on the table saw, and then slimmed them down with the drum sander.

Assembly Time
I brought everything out to the gazebo and assembled things there.
It’s all upside down in this pic, the bedframe sides are on the bottom, then the lats are screwed into rabbet cut along the bottom of the sides. The pedestal was then screwed into that.
Not that we plan on moving this that often, but it can be disassembled into smaller, packable parts if needed.

The Oak
It’s not a great picture, as it appears that the joint isn’t closed properly. It’s not as snug as usual because instead of being glued in-place, it uses special domino connectors that can be taken apart. Kinda like Ikea, but better.
But even at that the corner looks much better in real life, I just need to be a better photographer.
White Oak is a beautiful hardwood, and the Nordic White stain just brought it to life.

Lights, Camera, Action
Get your minds out of the gutter people!
I added an LED lighting strip to the bottom, pointing downwards to light up the floor around the bed. Since this was a pretty plain piece it needed something to jazz it up a bit.
On the wall above the bed, you’ll see the walnut picture frame I made to host four small paintings we picked up at a local artist’s gallery. Details can be found here - Walnut Frame.
Materials
- White Oak from Robert Bury
- Rubio Monocoat Nordic Pre-colour Easy for finish, with polyurethane for topcoat
- Kreg pocket screws for lat joinery
- Festool Domino with special domino connectors
- LED strip lighting from Lee Valley