More Picture Frames
A second round of frames for various pieces of artwork around the house
Background
We’ve got some artwork around the place that needed some sprucing up. Some of it is good stuff, some of it is the kind that you buy at Home Sense. Either way, a nice frame can go a long way to making it look a notch or two better.
This is the second round of “Shadow Box” frames that I’ve done. The first can be found here: Picture Frames
The Originals
Always good to get a “before” shot, since the “after” should look so much better. Here are pics of the original artworks without the frames.


Kinda blah right? Definitely needs something to make them pop.
Poplar to the Rescue
Poplar is very popular. Sorry, that joke never gets old, although Deb would say it got old about a decade ago. Still, I can’t help it. Hey, this is my blog and I will put whatever lame jokes I want to in here. Look, I am not forcing you to stay, you can move on if you like, but the bad jokes stay. They are my trademark, I am known for them. Yeah, I know I used the same lame joke on the original picture frames post, just let it go already!

Clamping
After milling the wood to size and cutting to length, it was time for glue-up and clamping.
Strap clamps (the black ribbon around the sides here) are perfect for keeping a piece like this under control

Glued and Nailed
I used the Festool Domino for the joinery again. It makes for a nice strong joint. Though it had been such a long time since the last time I did it, it seemed I had to learn everything all over again.
Lots of excess glue visible here, but that is going to be painted black and on the inside edge, never to be seen.
I used 23 gauge pin nails on the backing pieces to hold it to the side pieces while the glue dried.

Primed and Ready
The black paint/primer is applied to the whole thing, inside and out, but the outside is painted over with the metallic stuff. The primer helps protect it, and provides a foundation for the final coats.
I had to do it in the garage because of the cold weather outside as it would not dry otherwise. This made the whole house smell like a chemical factory. Not doing that again…unless I have more painting to do…then maybe.
In the back of this pic you can see snow piled up and covering the window. We had over 100cm of snow in the last week.
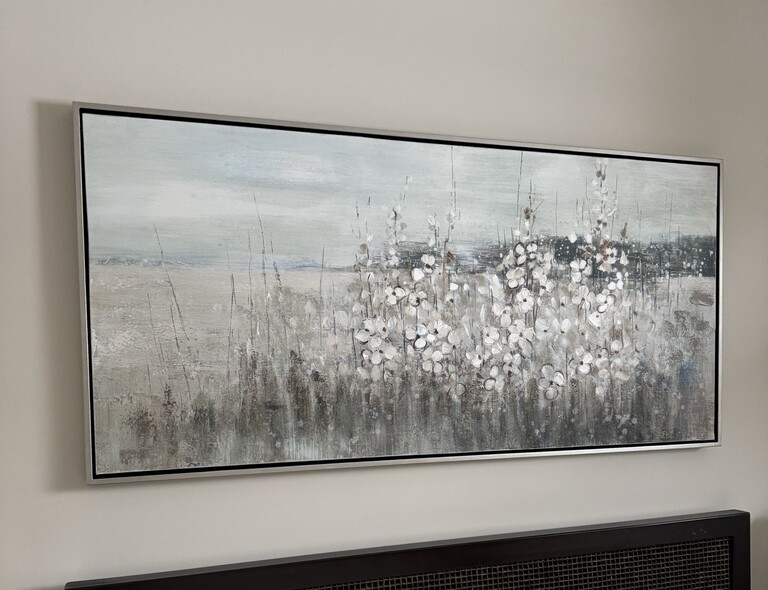
The Final Product


Update
So while I had the shop all setup for picture frames, I decided to do a couple more: one for the Gazebo and one for the new sauna room being built out back.

Gazebo Trees
This frame is in a small building we have out back that we call the Gazebo. It is totally enclosed, so not really a gazebo, but we called it that once and the name stuck. It is a nice place to hang out in the summer, with cool breezes and cool colours. Unfortunately, this painting is in the same cool place, and needs something to make it stick out against the pastel walls.

Domino Dominance
Since I talk a lot about using Festool Domino, I figured I would finally add a pic that shows them being installed on the mitre joints for strength and alignment.
The frame isn’t very thick, about 11.5 mm, so I have to use the smallest dominoes that I have, 4mmx20mm. You can see one on top of the board on the right.

Framed Forest
Mounting this one took a bit of finesse. The internal frame of the painting had become skewed, and was sort-of trapezoidal. I wasn’t about to make my frame trapezoidal to match that mistake, so I had to bend it back into shape.
I clamped it square for a couple of days, then wedged it firmly in place while screwing it to the new frame. I used a lot more screws than normal to keep is square, around 20 I think.

Cutie Patootie
That is one adorable, and well-fed bird.
I used a new set of paints on this frame, a “glass acrylic” that claims to be good on woods, glass, and ceramics. It worked pretty well.
Deb created an excellent colour match, so the frame goes great with the branches in the artwork.
Don’t forget to check out the walnut frame for the birds right here. It was the first of the bunch.
Materials and Tools
- Poplar from KJP Select Hardwoods
- Acrylic Paint from Michael’s
- Festool Domino for mitre joinery