Walnut Table and Benches
A big project with a whole lot of walnut
Background
This is perhaps my most complicated project to date, with the possible exception of The Daybed. It took about six or seven weeks. The design called for the table to fit in a certain area in our theatre room. We watch movies there, but it’s a big room and we also use it for other things. This table is to serve as a craft table for my niece Lilly and any other folk who want to make stuff here. You can make whatever you want at this table.
The Table

The Legs
So the legs were fun and different. We set out to mimic the design of our dining room table upstairs, I went back and forth a lot on the best way to do that.
Do I cut a bunch of similar parts, but have many more parts, then glue them all together? Or do I make fewer parts, but each part more customized. The former is easier to do, but the glue-up is much more difficult. The latter is more complicated to make the pieces, but far fewer pieces to glue-up.
I decided on the latter approach and I think it was for the best. The glue-ups were pretty complicated as it was, so I wouldn’t want to make them any more difficult.

The Top
When it comes to the table top, you start with a bunch of boards. Here they are, laid out and ready for initial milling.
This was a pretty good batch of lumber from KJP Select Hardwoods but there were a few really curved boards, so I had to go back for a couple more.

The Glue-up
The table top shown here, glued together and finished with Rubio Monocoat walnut oil 2C. Great stuff.

The Legs Fin
The assembly of the legs is a surprising amount of work. Next time you are at a dining table, take a look under. Not that I want to encourage this habit at your finer dining establishments, but there is likely to be a whole lot going on under there.
The metal brackets in the corners was probably overkill, as the Festool Domino XL was used to put in some big 80mm tenons. There are four tenons in each corner, which should give it more than enough strength. BooYah!
The Benches

Bench Legs
The bench legs followed the same general design pattern as the table legs, just scaled down to 2/3 the size of the table. This scaling was a general rule for the benches, which I intentionally broke in a few places, like in the support stretchers for the bench-tops, which I made as thick as I reasonably could to make sure it was strong enough.

Bench Tops
The bench tops were a lot easier than the table top. Each of them is a little less than half that of the table top, so there is much less worry about warps and twists.
The photo here makes the tops look a little blotchy. I don’t know why. In real life they are much smoother and look way better than this photo. I gotta work on my photography skills.

Bench Legs Fin
These are the bench table legs. The inside stretchers in the middle are really just for alignment of the outside stretchers, keeping them parallel.
Putting It All Together
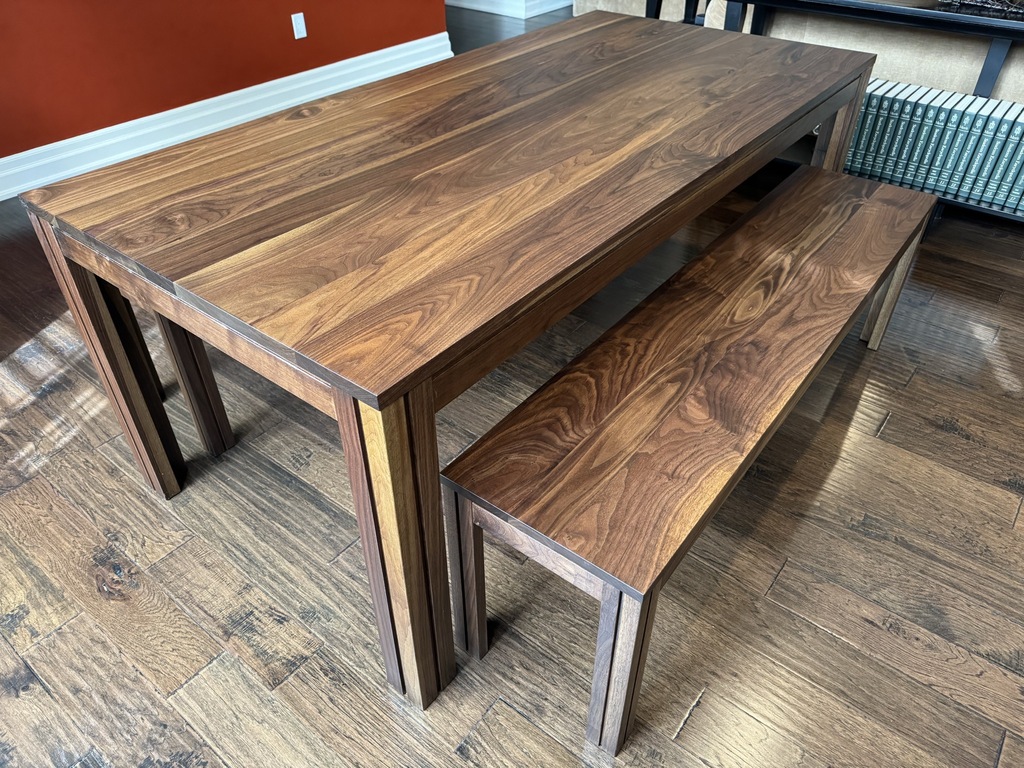
So you put the tops on the legs of both the tables and the two benches, assembled with some funky z-clips to avoid any expansion and contraction issues, and then you bring it all together and you have this.
Here is a mini photo gallery of the table and benches setup in our theatre room. Click on a pic to zoom in for details if you are so inclined.


The Video
Walnut Table - 180° View
Materials
- Walnut from KJP Select Hardwoods
- Rubio Monocoat Walnut Oil 2C for finish
- Hardware from Lee Valley
- Lots of Festool Domino usage, both the standard and the XL, for the joinery